18 Common Mistakes DIY Turf Installers Make
Whether you’re tackling a DIY turf project for the first time or are a seasoned turf installer, learning to avoid mistakes will make your projects go a lot smoother and safer. Read on to find out 18 common mistakes DIY turf installers make, and how to keep them from derailing your next landscape project.
#1: Insufficient excavations
Laying artificial turf directly on top of soil or grass just does not work. The finished result would be an extremely uneven looking lawn.Solution: Remove at least 4 inches of lawn, including all existing grass and weeds. For poor draining areas, it’s recommended to remove 5-6 inches. To check the depth of your excavation, pull a string line tight across your lawn and measure between the string line and the subgrade/soil level. Avoid adhesive on the perimeter. Stick to nailing into sub-base or stapling or screwing into perimeter nailer strip every 6 inches or so.
#2: Failure to excavate soft spots in the subgrade
After excavating your existing lawn, check the subgrade/soil for soft spots – areas of the ground sinks under your weight. If your feet begin to sink into the ground, excavate the area and backfill with sub-base material.Failure to remove soft spots may potentially result in certain areas of your lawn sinking.
Solution: Remove any soft spots during the excavation works. Remember, it’s better to remove too much than not enough.
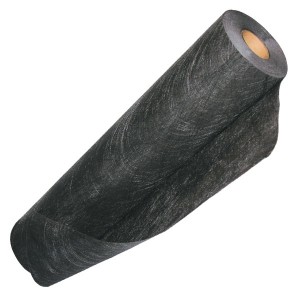
#3: Failure to install a weed membrane
Without a weed membrane, it’s quite possible that you’ll have real weeds springing up in your artificial lawn.One of the main benefits of having artificial turf is that you no longer have to deal with weeds – so you certainly don’t want to let that happen.
Solution: Install a weed membrane to the subgrade (underlying earth). Consider using a second layer of weed membrane on top of the laying course, directly beneath the artificial grass.
#4: Inadequate sub-base installation
When installing artificial turf there are two layers of aggregates that need to be installed prior to laying the grass.The first of these is the sub-base, which gives the lawn strength to handle the weight of foot traffic.
Solution: The sub-base should typically be comprised of at least 50mm of MOT Type 1. For poor-draining gardens, you’ll want to use 50mm of 12mm granite or limestone chippings to form a permeable sub-base. For areas that are subjected to heavy use, consider installing a 75mm sub-base.
#5: Using sharp sand as a laying course
The next layer of aggregate that should be installed above the sub-base is the laying course. It provides a flat and even surface for the grass to lie on top of.It’s vitally important that the laying course that will be capable of withstanding foot traffic and rainfall.Some installers use compacted sharp sand for the sub-base, but here’s the problem – sand doesn’t bind together well, which causes movement of the laying course and ultimately an uneven lawn. Additionally, the sand will eventually wash away, also resulting in an uneven appearance.
Solution: Install a laying course to a depth of 25mm that consists of either 0-6mm granite or limestone dust, preferably whatever you can source locally. Granite or limestone dust forms a much stronger laying course than sharp sand with a better finish too.
#6: Inadequate compaction of sub-base and laying course
After levelling the sub-base and before spreading the laying course, you’ll need to make sure that the sub-base is adequately compacted.Solution: Use a vibrating plate compactor to compact the aggregate. To ensure that the entire area is thoroughly compacted, move it up and down and side to side across your lawn. Failure to do so will again result in an uneven lawn surface.
You can often find one to rent or buy from a local hardware store, but don’t be too hasty to return it; you’ll need to use it again on the laying course.
Bonus tip: Prevent dust from becoming airborne by using your garden hose to lightly sprinkle water onto the granite or limestone dust before compaction.
#7: Uneven laying course
Not only is it important to use the correct form of aggregate and to ensure proper compaction, but the final step when installing the laying course is to ensure that the surface is perfectly flat before you can lay the artificial grass.You will likely find that after running a plate compactor over the laying course it will leave minor indentations in the aggregate that will need smoothed out before installing the grass.
Solution: To avoid ridges or bumps showing through your artificial grass, use a float to flatten them before laying the turf.
#8: Failure to install an appropriate edge restraint
Edge restraints are an important aspect of artificial grass installation for two reasons. First, they retain the sub-base and laying course, preventing the lawn from collapsing at the edges. Additionally, they give an anchoring point to which the perimeter of the grass can be secured.When it comes to choosing the edging material for your lawn you have several options: treated timber, treated sleepers, concrete edging or metal edging systems.
Solution: Use a secure edging system capable of retaining the sub-base and laying course. Secure the perimeter of the turf with either galvanized nails (for timber edging) or artificial grass adhesive such as Aquabond or Multipurpose Adhesive.
#9: Failure to allow the artificial grass to acclimate
The only feasible way to ship artificial grass is in the form of rolls. It’s normal for there to be minor ridges and bumps in the grass when it’s first unrolled – it is due to the hard-wearing back holding its shape. After leaving it unrolled for 24 hours, though, they will naturally even out, so the turf will be easier to lay.Solution: Unroll your artificial grass on your lawn and allow it to acclimate in the warm sun an hour or two prior to installing. Colder day installs will require a little more stretching.
#10: Pile is facing in the wrong direction
When you inspect it closely, all artificial grass has a slight pile direction, meaning that the fibers of the turf are all pointing in same direction.Solution: When joining two rolls of artificial grass, ensure the pile is facing in the same direction on each roll to avoid a visible line and distinct difference in shade of color.
#11: Seams are cut incorrectly
Artificial grass is typically supplied in rolls of 15 feet width. Due to the shape of your lawn, you may need to join multiple rolls of grass together to cover it.This is where problems can happen if you do not follow instructions carefully.
Solution: Remove the strip of membrane attached to the outside edge (known as the selvedge) before gluing pieces of turf together. To ensure an invisible join, cut 3 stitches off the edge of your artificial grass and cut close to the 4th stitch.
#12: Not securing seams sufficiently
When joining two pieces of artificial grass, it’s extremely important to ensure that they are properly secured together to prevent them from coming apart.Solution: Use seam tape and specialty adhesive to securely join two pieces of turf. The adhesive should be troweled with a 3/16" V-notch trowel, covering the entire width and length of the seam tape so to ensure it gets up into the ridges of the stitch row for a solid bond.
#13: Seam tape is used incorrectly
Seam tape is typically around 6" wide and supplied in lengths up to 100 LF. It is placed between the two adjoining pieces of turf. The adhesive should be troweled with a 3/16" V-notch trowel, covering the entire width and length of the seam tape so to ensure it gets up into the ridges of the stitch row for a solid bond.Solution: Make sure you apply generous amount of adhesive so it can bond to the back of the turf into ridges of stitch rows and make sure the entire tape is covered with.
#14: Using too much or too little adhesive
When securing joins, it’s important to use the right amount of glue. Using too much glue may result in the adhesive seeping into the fibers of the artificial grass. Using not enough glue obviously will not create a strong enough bond.Solution: Use V-notch trowel to spread adhesive. This will ensure proper coverage and lessen or eliminate chance of adhesive oozing through the seam. It is a good idea to secure with staples every 6" straddling seam to hold it down. Sand bags can be used to add weight during the curing time. Typical cure time is approximately 90 minutes.
Bonus tip: If adhesive gets on the plastic fibers, you can use a small amount of mineral spirits to remove it before it sets.
#15: Failure to secure the edges of your lawn
It’s imperative to install an edging restraint to the perimeter of the turf. Not only will this retain the aggregates beneath, but it will also give you something to secure the perimeter of the grass to.Failure to do this will result in your grass lifting at the edges.
Solution: Use a secure edging system capable of retaining the sub-base and laying course. Secure the perimeter of the turf with either galvanized nails (for timber edging) or U-pins or artificial grass adhesive such as Aquabond or Multipurpose Adhesive. Cartridges may be more beneficial than tubs of glue, as using a gun applicator allows for more precision.
#16: Failure to install a sand infill
There are several reasons you should install a sand infill: it adds balance to the grass, preventing movement and rippling; it supports the artificial fibers; it regulates the temperature of the grass; it increases fire resistance; it improves and regulates drainage; and it prevents static.There may be additional cost to install a sand infill, but it is certainly worth it. You can pick up bags of Silica sand from your local DIY store and sourcing locally keeps shipping cost down.
Solution: Install a sand infill to your artificial lawn. You can pick up bags of Silica sand from your local DIY store for a fairly low price.
#17: Failure to power brush the turf
The final task when installing artificial grass is to power brush the turf. If you don’t, the sand infill will sit on top of the fibers, flattening them down and lacerating the latex resulting in less protection against sharp objects.Solution: Once you’ve applied the sand infill, brush the turf with either a stiff broom or a mechanical brush. This enables the sand infill to fall to the bottom of the pile, so it sits on and helps protect the poly-urethane backing. It also means that the fibers will stand upright, making the grass appear even more realistic.
Bonus tip: Make sure you use a hard bristle brush.
#18: Choosing poor quality artificial turf
Our last mistake isn’t really an installation mistake, but a potentially devastating error nonetheless.There’s lots of options to suit your artificial lawn needs, so be sure to do some research to find what’s best for you.
Solution: Check out our top-grade Easy Turf artificial grass here. Multiple options are available.